
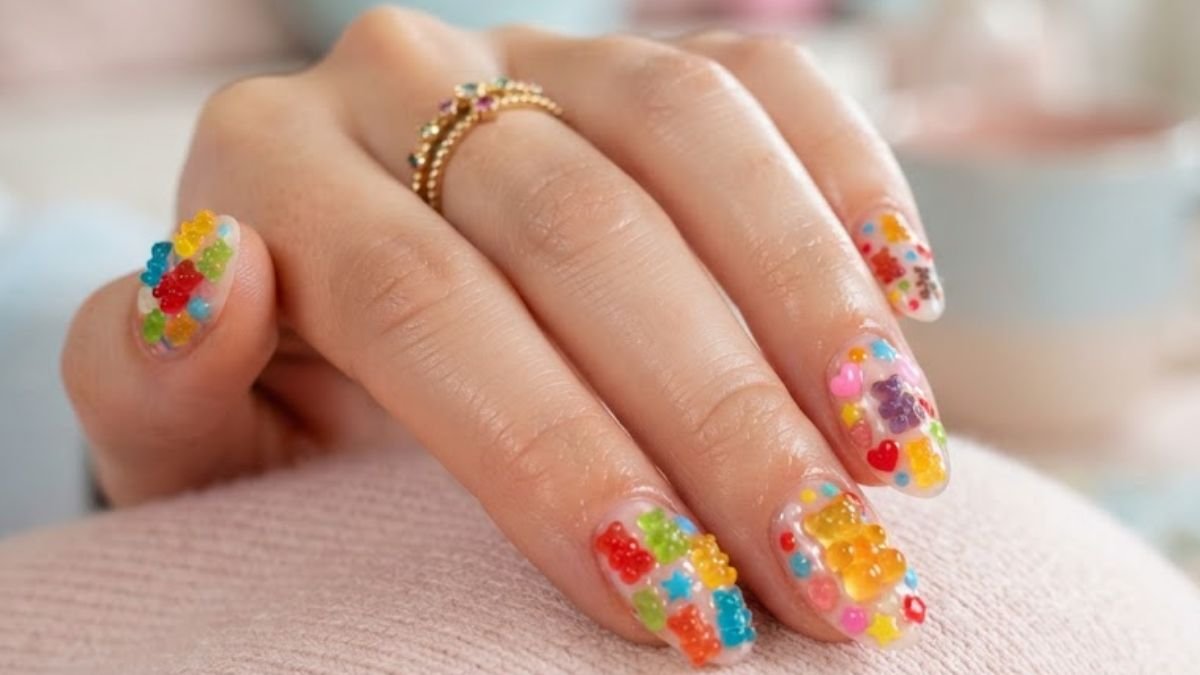
Gummy nail art is built on one quality: translucency. A jelly-like, see-through color lets light pass through the nail the way it passes through a gummy bear held up to a window. Pair that sheer tint with bright candy tones and a thick, glossy top coat and you get a manicure that looks soft, sweet and almost squishy. Opaque polish can’t copy that depth, which is why technique matters as much as color here.
The 15 ideas below run from a simple single-tone jelly to a full set with embedded gummy bear charms. Each one includes enough detail to brief your nail tech or pick a matching press-on set, plus the steps to recreate it at home.
Classic Gummy Nail Art Designs
Single-Tone Gummy Jelly
One sheer gel color, bright enough to read as candy but thin enough to show the natural nail underneath, is the foundation of every gummy manicure. Strawberry red, gummy bear green, watermelon pink, blueberry blue and lemon yellow are the shades that look most like real gummies. It suits short and medium nails especially well, since the color stays even across a smaller surface, and it grows out gracefully because the sheer tint softens the regrowth line.
To get the tint, mix a drop of bright gel color into a clear gel base and apply one or two thin coats. You should still see a hint of your nail through the color. Finish with a thick, domed high-gloss top coat. That extra depth gives the nail its chewy, candy-like look. Our guide to aura effect nail ideas explains how sheer tints build up over the natural nail at different opacities.
Gummy French Tip
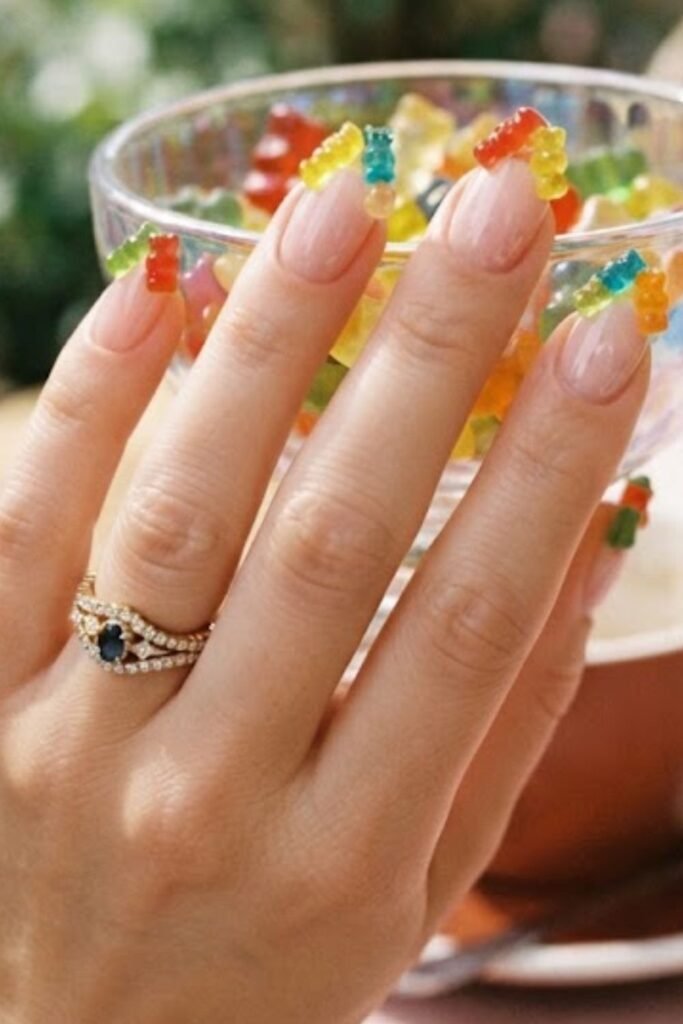
A gummy French tip swaps the classic white tip for a sheer jelly color, such as translucent strawberry pink, clear candy green or sheer cobalt, painted over a clear or nude base. The bare base makes the tip look even more see-through, so the candy color seems to glow at the edge of the nail. It’s a good entry point if you want the trend in an office-friendly form, and it works on almond, oval and squoval shapes. For a crisp smile line, the tape and brush methods in our French nail ideas roundup apply here too.
Apply the clear or nude gel base and cure it. Paint the jelly gel on the tip only, in one thin pass so it stays translucent, then cure. Seal the whole nail with a domed glossy top coat so the base and tip melt into one smooth surface. Ask your tech for a slightly deeper tip than a micro French, because the jelly color needs some width to show off its translucency.
Gummy Bear Color Set
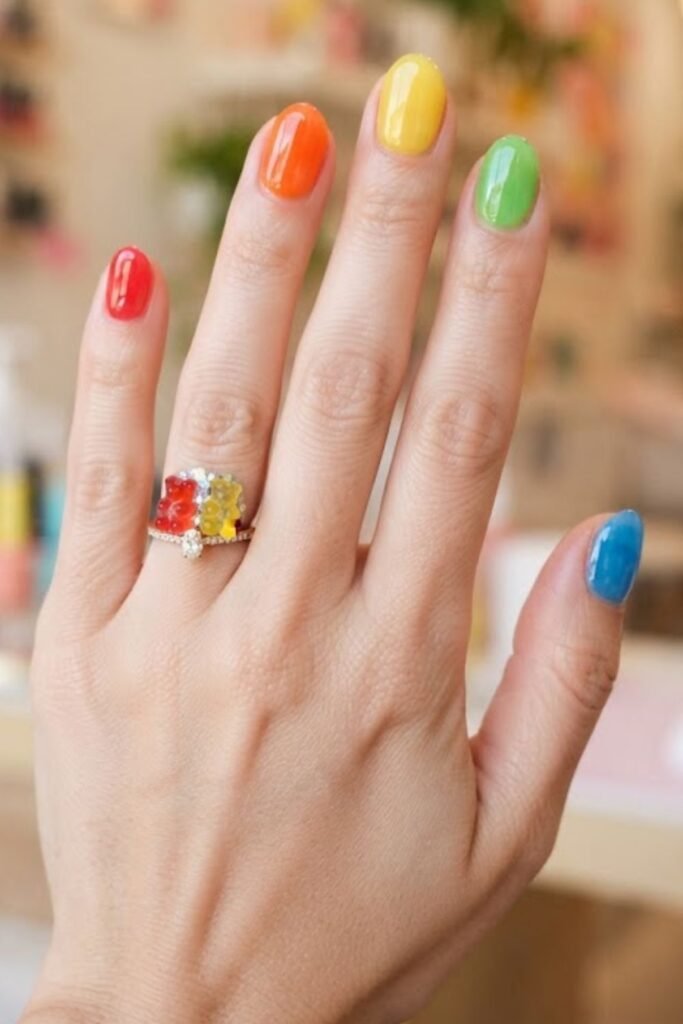
This set copies the classic gummy bear bag: red on the thumb, orange on the index, yellow on the middle finger, green on the ring finger and clear or pale blue on the pinky, repeated on both hands. Every nail is its own flavor, and the overall effect is cheerful and very candy-inspired. It’s an easy skittle manicure to wear for summer, birthdays or festivals, and it suits any length because each nail carries a single color.
Keep all five shades sheer so your natural nail shows through each one. A little variation is fine: the red can sit slightly more opaque and the yellow slightly more see-through, just as real gummy bears do. Use the same top coat and the same nail shape on every finger so the mix of colors still looks like one planned set.
Clear Gummy with Glitter
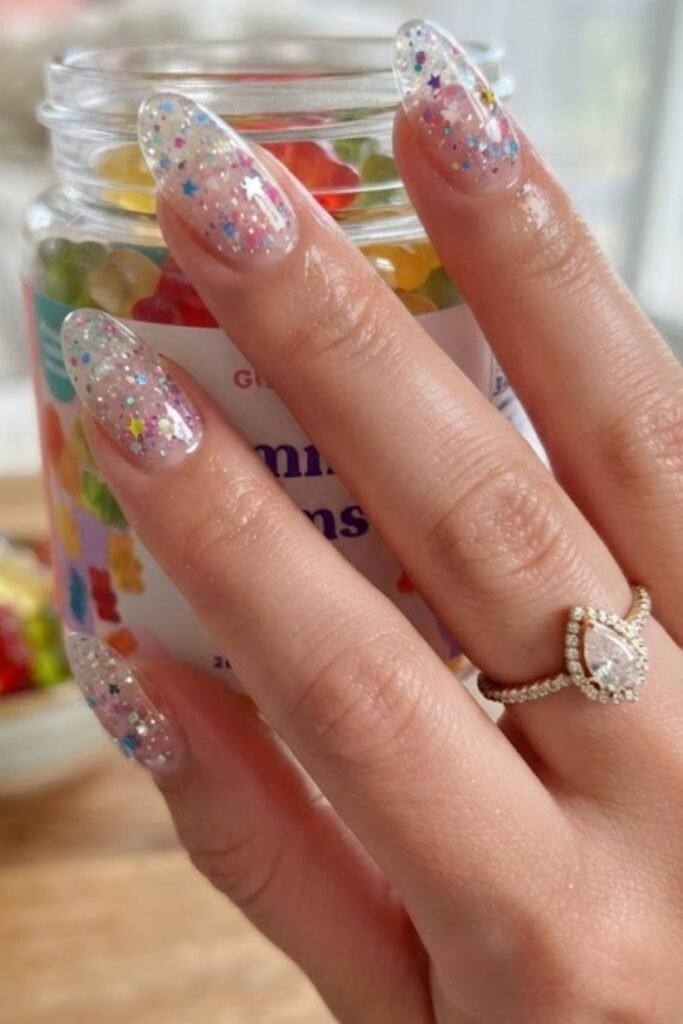
A clear jelly base with fine holographic or iridescent glitter suspended inside it looks like a gummy bear filled with sparkle. Because the glitter sits within the gel instead of on top, it catches light at different depths and shimmers as your hands move. Choose a fine or micro glitter, since chunky pieces tend to sink to the bottom and look patchy. This design suits anyone who wants a party-ready manicure that still looks light and wearable.
Stir the glitter directly into a clear gel before you apply it so the particles spread through the whole layer. Apply in two thin coats, curing between them, then finish with a domed glossy top coat to magnify the sparkle. Silver holographic glitter looks cool and icy, while gold or pink iridescent glitter looks warmer.
Shaped and Illustrated Gummy Nail Designs
Gummy Bear Silhouette on Clear
A small gummy bear outline, painted in a sheer tint and centered on a clear or pale nude base, is the minimalist way into gummy nail art. The shape does the work, so the nail stays simple and clean. Keep the bear about eight millimetres tall so it sits comfortably on medium nails. On short nails, scale it down or place it on one or two accent fingers only.
Use a fine round brush loaded with sheer bright gel and draw the bear in one continuous outline so it looks see-through like a real gummy. Add two tiny dots for eyes, cure, then finish with a glossy domed top coat. If freehand drawing feels tricky, small gummy bear nail stickers placed under the top coat give a similar look. A clear base hides regrowth well, so this set can comfortably last three weeks.
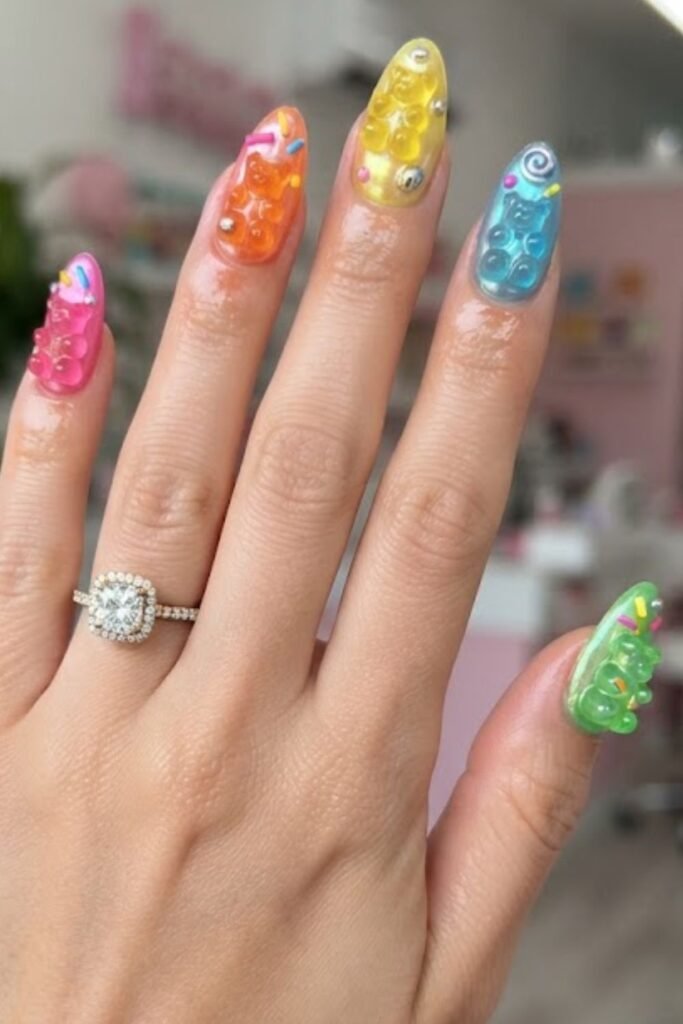
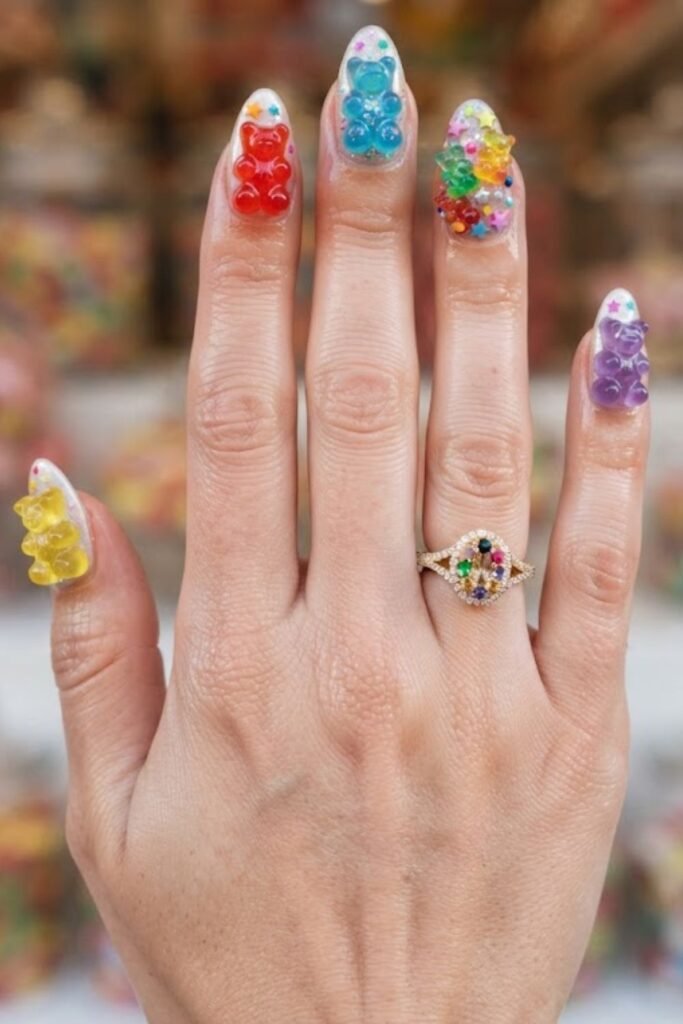
3D Gummy Bear Embellishment
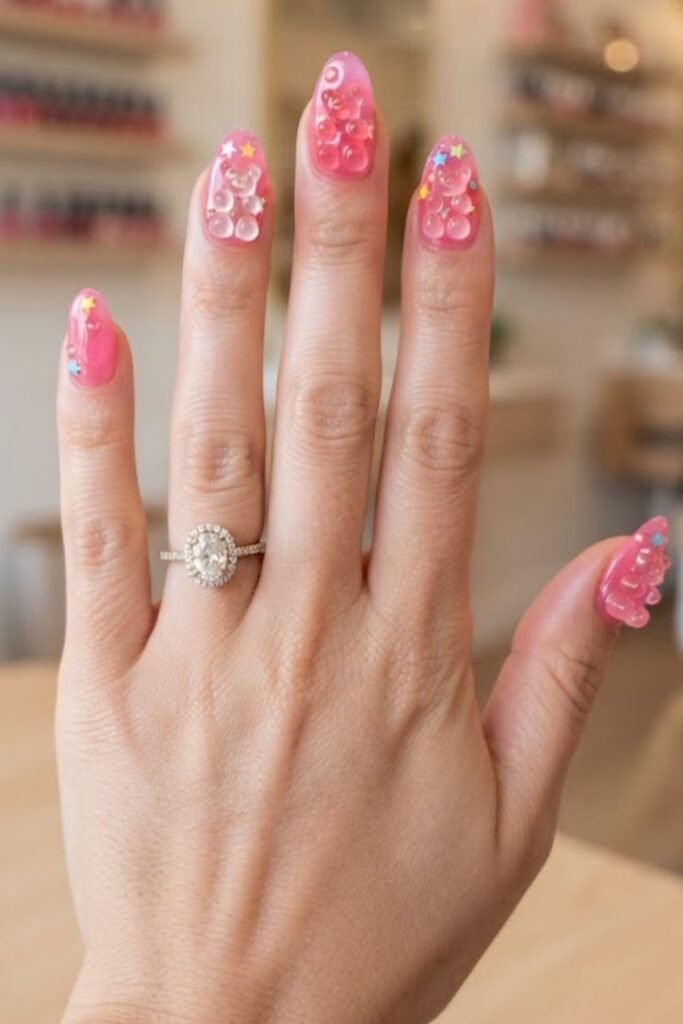
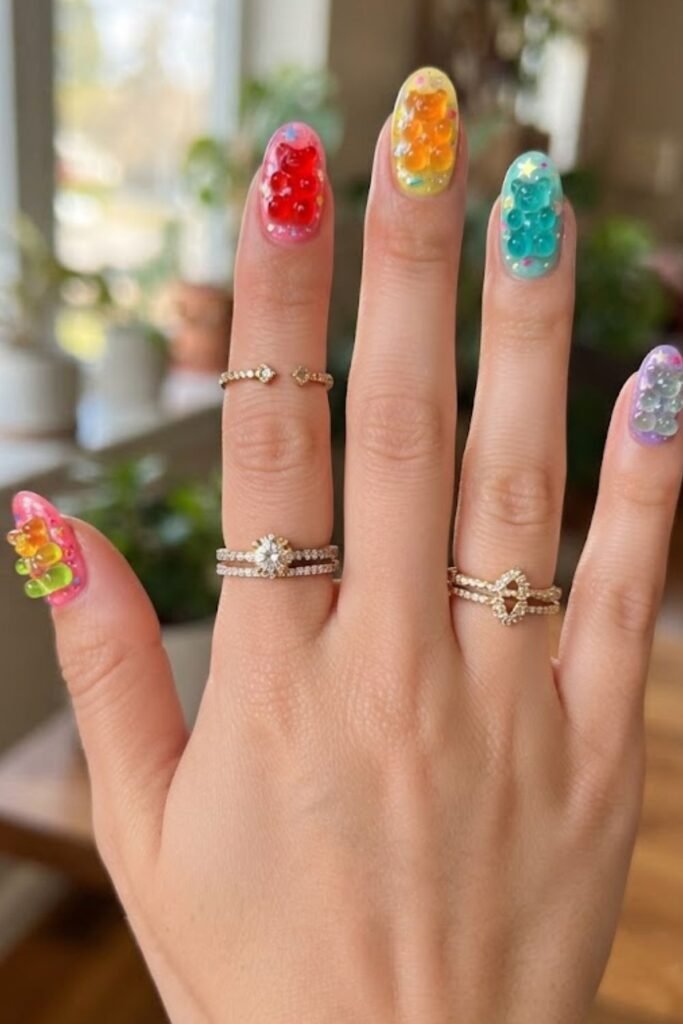
For the most literal take on the trend, press a tiny 3D gummy bear resin charm into a domed clear gel layer so the bear looks sealed inside the nail. The finished bear should sit fully encased under the gel, with no edges poking above the surface to snag on hair or knitwear. This works best on medium or long nails with a little width, and many people keep it to one or two accent nails with simple jelly color on the rest.
Apply a clear gel base and cure. Add a second layer of clear gel, place the charm on it while it is still uncured, press gently and cure. Build a third, domed layer of clear gel over the bear until it is completely covered, then cure again. Work slowly and pop any air bubbles with a fine brush before each cure, since trapped air turns cloudy. Our goddess nail designs show more ways to set charms and embellishments into gel.
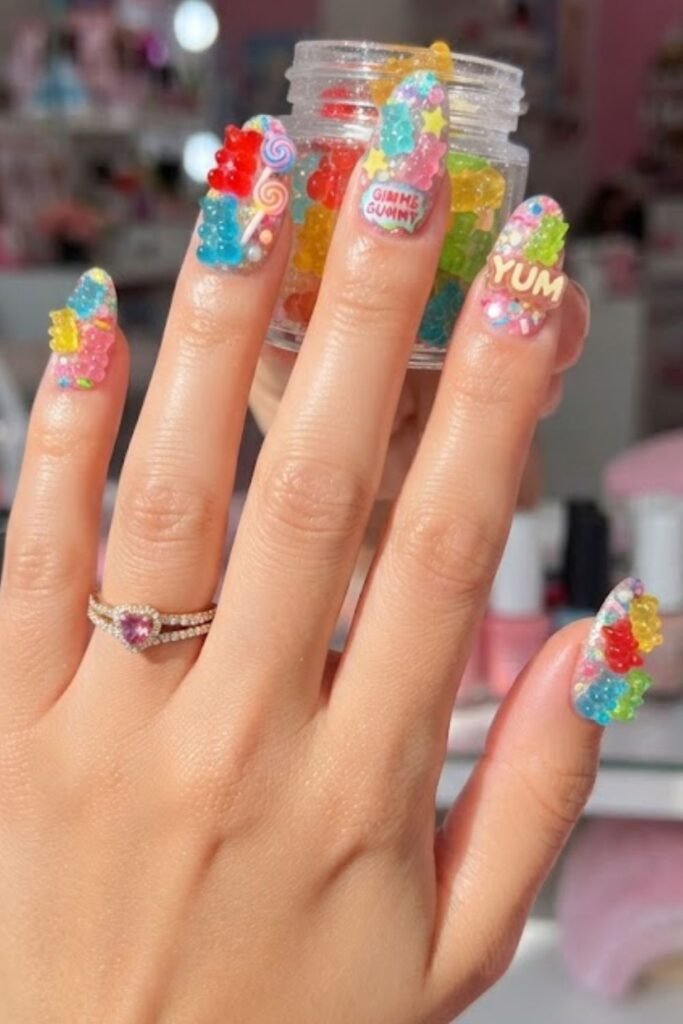
Gummy Worm Illustration
A two-tone gummy worm, pink and yellow or red and green, curling across a clear or pale jelly base is the most playful design here. Start the worm near the cuticle and let it curve toward the tip as if it is lying across the nail. It suits longer almond or oval nails, which give the worm room to curl, and it’s a fun choice for summer, birthdays or any time you want a manicure that makes people smile.
Paint the worm in a loose S curve with a fine brush, alternating the two gel colors in short sections of equal length to copy the striped look of a real gummy worm. A light dusting of fine white glitter over the uncured worm mimics the sugar coating on sour worms. Cure, then seal with a glossy domed top coat. Keep the rest of the set simple with sheer jelly color so the worms stand out.
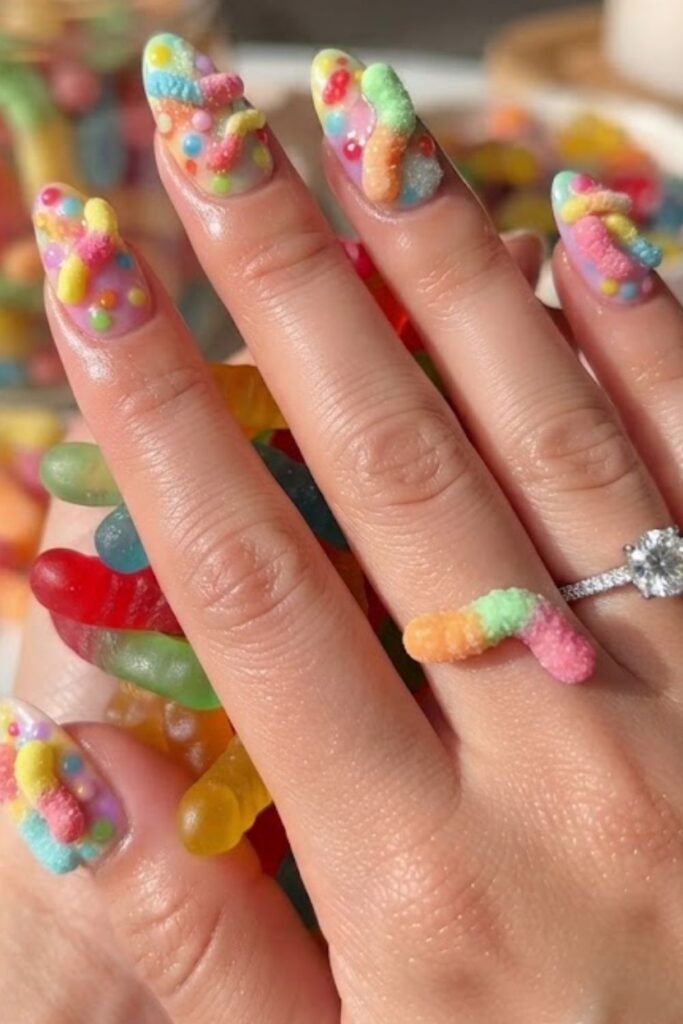
Candy Ring Accent
This accent nail copies the plastic candy ring toy: a wide band of alternating candy colors across the center of the ring finger, topped with a small round “gem.” The other nine nails wear a simple single-tone gummy jelly in a matching candy color. Keeping the detail to one finger makes it easy to wear every day, and it’s a sweet choice for a bridal shower or a birthday manicure.
Paint the band two to three millimetres wide across the middle of the nail in alternating color blocks. Add a small oval or circle at the top center of the band for the gem and fill it with a contrasting candy shade. Finish with a domed high-gloss top coat so the ring looks raised and shiny. A tiny dot of white gel on the gem makes it look faceted.
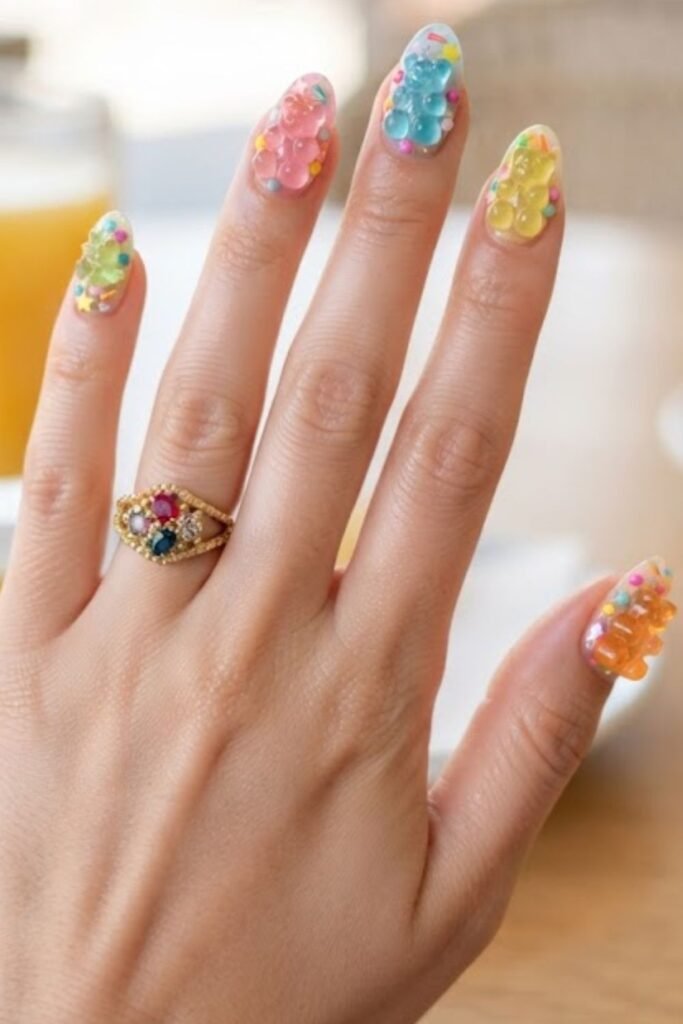
Texture and Finish Gummy Nail Designs
Gummy Glaze Nail
A gummy glaze nail builds a sheer candy tint under several layers of clear gel until the surface is deeply rounded, like a glazed donut in a see-through candy shade. The extra depth catches and bends light in any setting, so the color looks richer and wetter than a single flat coat. It’s a good choice for short natural nails that need a little strength, since the layered gel also adds structure and helps fragile tips grow out.
Apply the sheer candy gel in one pass and cure. Add three to four thin layers of clear gel, curing between each. For the last layer, apply a generous bead of thick, self-leveling clear gel and cure with the finger held level so the gel settles into a dome instead of running to the tip. A high-gloss top coat finishes the glaze. If the gel starts to pool at the sides, flip the hand upside down for a few seconds before curing.
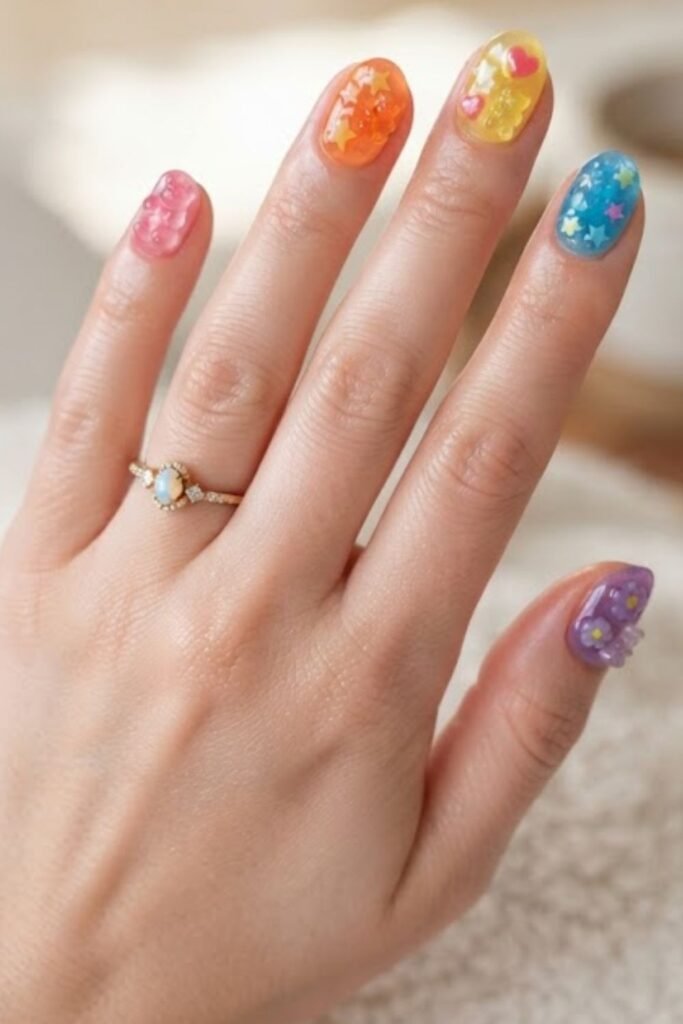
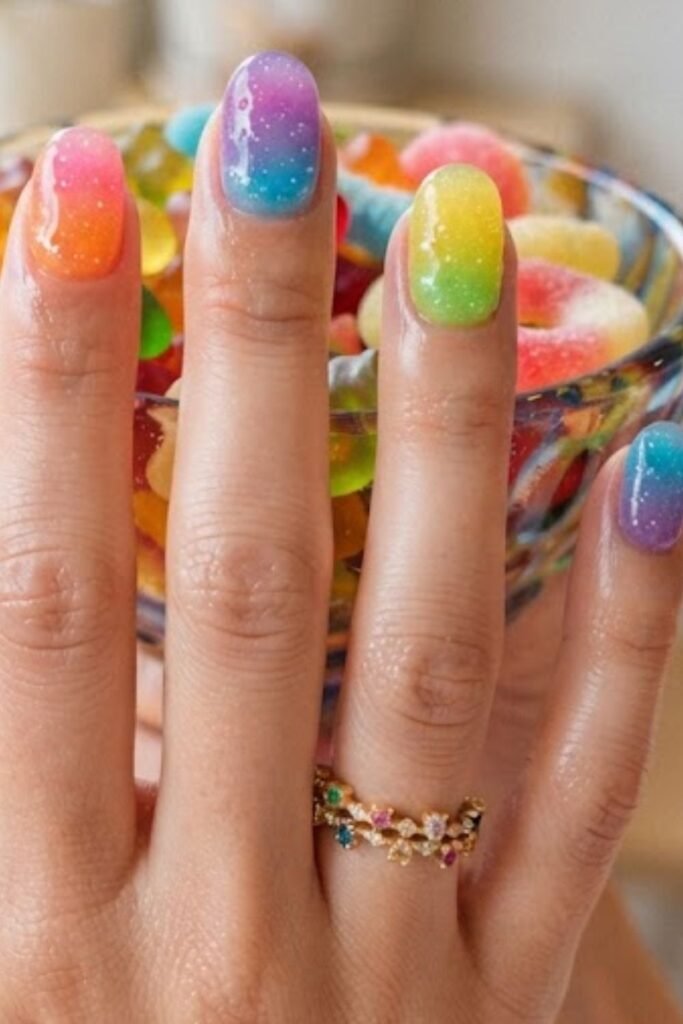
Gummy Ombre
A gummy ombre blends two sheer candy tones into one gradient, for example sheer strawberry red fading into watermelon pink or blueberry blue melting into grape purple. Both shades stay translucent so the natural nail shows through from cuticle to tip, which gives the gradient a soft, jelly-like depth. It looks great on almond and coffin shapes, where the longer nail gives the colors room to blend. The sponge technique in our ombre nail ideas guide works the same way with sheer gels.
Mix both colors at the same low opacity you would use for a single-tone jelly so the gradient stays see-through all the way along. Dab the colors onto a makeup sponge side by side, press onto the nail, cure, and repeat once for a smoother blend. Finish with a domed glossy top coat to smooth out any texture from the sponge. Clean up the skin around the nail with a small brush dipped in alcohol before curing.
Candy Chrome Gummy
Candy chrome layers a bright chrome powder, such as pink, green or blue, over a sheer gel base in the matching shade. The result looks like a gummy bear with a mirror finish: glossy and reflective on top, with a see-through candy color underneath. The effect shifts with the light, flashing metallic in bright sun and looking deep and jelly-like indoors. It’s a good pick if you love glazed donut nails and want something brighter.
Apply the sheer gel color and cure. Add a thin layer of no-wipe top coat and cure again. Buff the chrome powder over the surface with a silicone tool or soft applicator in small circles until it turns mirror-like, dust off the excess, then seal with another no-wipe top coat, capping the free edge so the chrome doesn’t wear off at the tips. The sheer base lets the candy color glow through the metallic layer.
Pattern and Scene Gummy Nail Designs
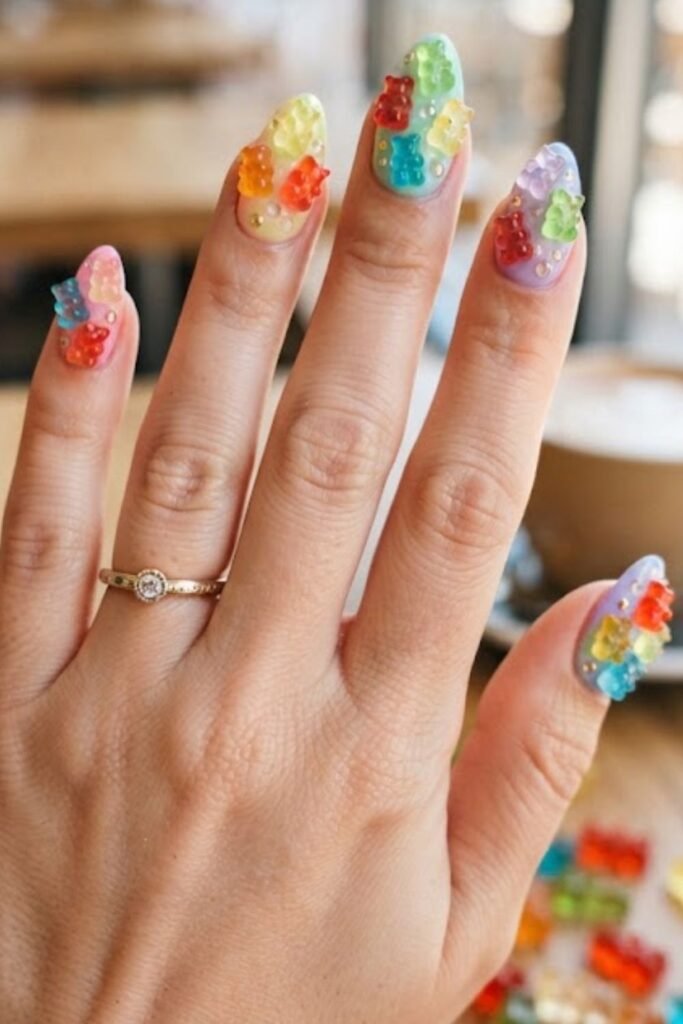
Gummy Bear Scattered Pattern
Lots of tiny gummy bears, each in a different candy color, scattered across a clear or pale jelly base make the nails look like they’ve been dipped in a bag of sweets. Orange, red, green, yellow and clear bears in random positions keep the design lively. It’s a fun choice for longer nails with room for several bears, and it pairs well with plain jelly accent nails if you want to tone the look down.
Paint each bear with a fine brush at about five to six millimetres tall and turn them in slightly different directions: one facing left, one facing right, one on a diagonal. Fill each outline with its own sheer candy gel, cure, and finish with a glossy domed top coat. Leave some clear space between bears so the pattern looks airy. Stickers or decals are a quicker route if freehand detail isn’t your thing.
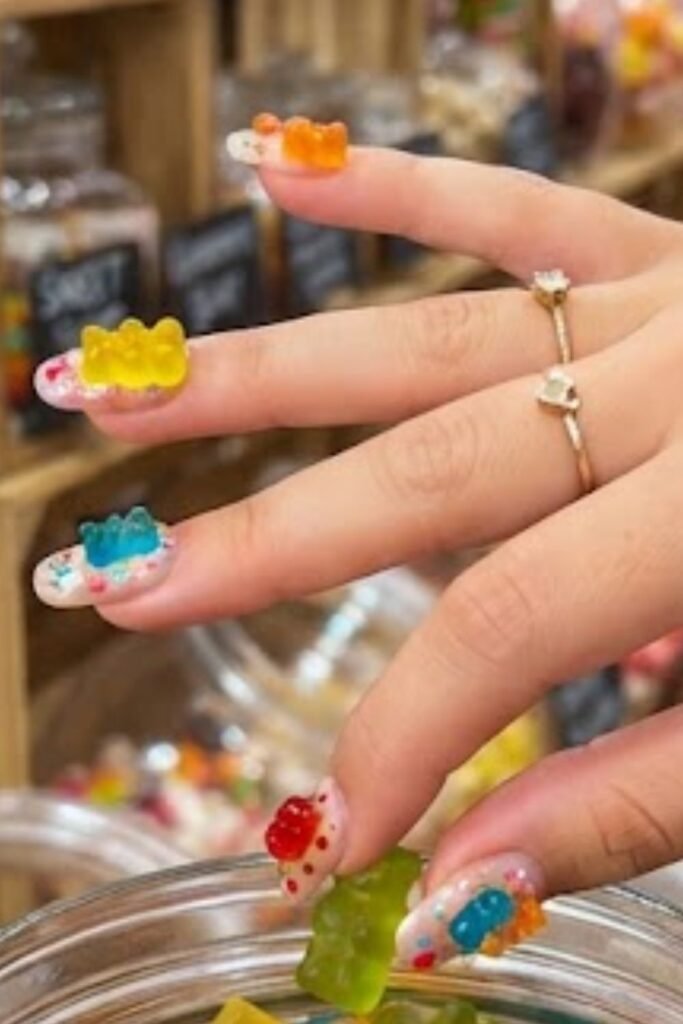
Candy Shop Scene
Each nail becomes a tiny candy shop window, with glass jars of colorful gummy bears lined up on a shelf, painted in fine gel lines on a clear or pale pink base. Give every nail its own jar or shelf arrangement so the full set tells a little story. It’s a detailed design best done by a tech who enjoys hand painting, so book extra time and bring reference photos. Longer nails give the scene room to breathe.
Paint the shelf line across the lower third of the nail first. Add the jars above it as rounded rectangles, then fill each jar with a different sheer candy gel to suggest the gummies inside. Finish each jar with a small round lid, cure, and seal with a glossy domed top coat. Short nails can carry a simplified version with one jar per nail, and our short square nail ideas show how to scale detailed art down to a smaller canvas.
Gummy Rainbow
A small rainbow arc painted across each nail in sheer candy tones (red, orange, yellow, green, blue and violet) looks like stained glass and gummy candy at once. A clear or white base makes the stripes glow. It’s a bright choice for Pride, summer holidays or festival season, and it works on most lengths because you can scale the arc to fit the nail.
Use a fine striper brush and keep each stripe the same width. Let the arc follow the curve of the nail, with the highest point at the center and the ends reaching toward the side walls. Cure each color before adding the next so they don’t bleed into each other, then seal with a glossy domed top coat. For a softer take, blend the stripes slightly with a clean brush before curing.
Mixed Gummy Statement Set
A mixed set puts a different gummy design on each finger: single-tone jelly on the thumb, a gummy French tip on the index, a bear silhouette on the middle finger, a 3D gummy bear charm on the ring finger and a gummy ombre on the pinky, repeated on both hands. A clear or pale gel base on all ten nails ties everything together. This is the set to choose when you can’t settle on one idea from this list.
The most important step is applying the same high-gloss domed top coat across every nail, whatever design sits underneath. That shared finish turns five different designs into one curated collection. Choose two or three candy colors to repeat across the set so it doesn’t look busy, and wear it with solid-colored outfits so the nails take center stage.
Tips for Gummy Nail Art
Keep It Translucent
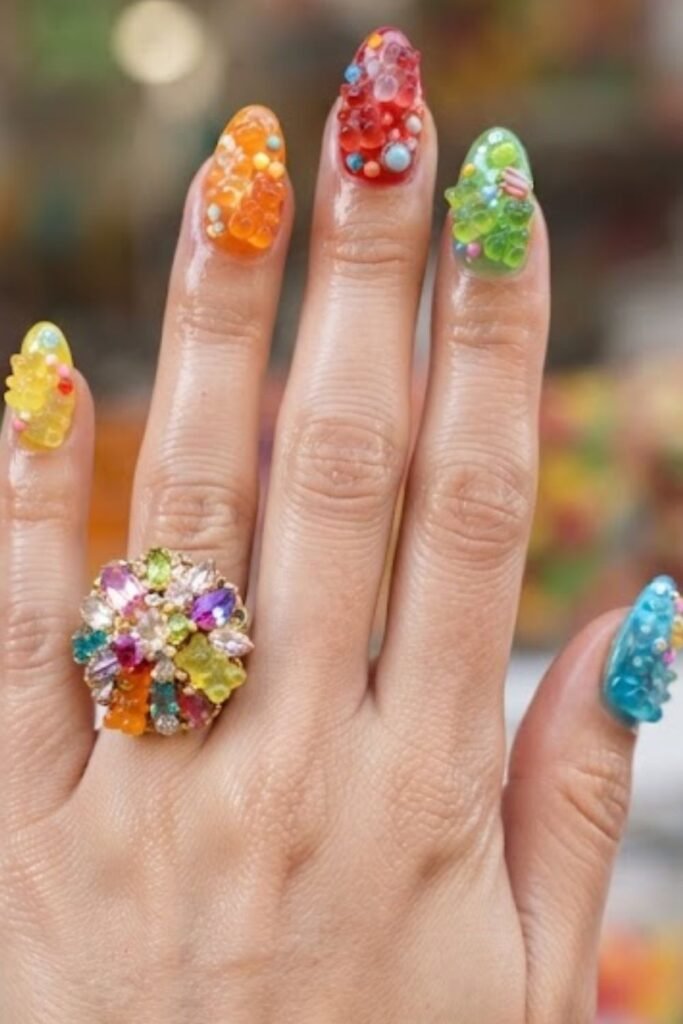
Translucency is what makes a nail look gummy. Light needs to pass through the color layer to create that soft, candy-like depth, and any gel color applied at full opacity simply looks like a regular colored manicure. Mix bright gel into clear gel, apply in thin coats, and check that you can faintly see your natural nail before adding the top coat.
The Dome Makes the Gummy
The domed top coat is what gives a gummy nail its shape. A standard thin top coat leaves a flat, shiny nail. Apply the top coat a little thicker, let it settle for a few seconds, then cure, and you get a rounded surface that catches light from every angle. This one step separates a gummy nail from a simple sheer manicure.
Stick to Bright Candy Tones
The classic gummy palette is strawberry red, orange, lemon yellow, lime green, blueberry blue, grape purple, watermelon pink and clear. Dusty or muted shades lose the candy effect no matter how sheer you make them. If a color doesn’t look like it belongs in a bag of sweets, save it for another manicure. Pick the brightest version of each shade and make it sheer instead of toning it down.
Frequently Asked Questions
What products do I need for gummy nail art at home?
You need a clear gel base or clear builder gel, a bright gel color or nail tint, a UV or LED lamp, a high-gloss top coat and a fine nail art brush for any detail work. The main difference from a standard gel manicure is using clear gel as the mixing base and applying the top coat in a thicker, domed layer. Gummy and jelly press-on sets are also widely available and are an easy option for the simpler designs.
How long do gummy nails last?
A gel gummy manicure with good prep usually lasts two to three weeks before lifting or tip wear. The clear gel layers that build the dome are the strongest part of the set, and the tint sealed inside won’t chip on its own. As with any gel manicure, the free edge usually shows wear first. Gummy nails done with regular polish last around five to seven days, and a fresh layer of glossy top coat every few days helps keep the shine.
Can I get gummy nails without a UV lamp?
The most authentic result needs a gel system and a UV or LED lamp to build and cure the domed layers. Without a lamp, use a sheer candy polish in thin coats and finish with a thick, high-gloss top coat to imitate the dome. The effect is softer and won’t last as long. Press-on gummy nails give you the gel look with no lamp at all.
What nail shape suits gummy nail art best?
Oval and round shapes suit gummy nail art most naturally because their soft curve echoes the shape of a gummy bear, and the domed top coat settles evenly on them. Almond nails flatter the gummy ombre and single-tone jelly, since the tapered tip shows off the translucency. Coffin and square shapes give more flat surface for 3D charms and the candy shop scene.
Are gummy nails still on trend?
Yes. Jelly nails have been popular for several years, and the glossy, domed gummy version keeps the look fresh. The 3D charm and illustrated designs sit at the playful end of the trend, while the single-tone jelly and gummy French tip are easy to wear every day.
Final Thoughts
Gummy nail art comes down to two things: a sheer jelly tint and a thick, domed top coat. Every other choice on this list, from the color to the charm to the illustration, builds on those two steps. Get the translucency and the dome right and any of these 15 designs will look good enough to eat. If you love the sheer look, our sea-inspired nail designs use the same jelly layering in ocean blues and greens.